Easy Way to Add a Calendar to a Facebook Page I Manage
Step 1: Have your calendar link ready
If you already have your Teamup Calendar and want to add it into your Facebook business page, have a read-only link ready. If you are brand new to Teamup, create a free calendar and populate it with your events.
For calendar administrators: To locate a read-only calendar link, go toSettings>Sharing. Here you may find a pre-configured read-only link named Reader (or create a new link and assign the Read-only permission to the sub-calendars that you want to share on your Facebook page). Right-click thelink, and copy link address.
To prevent your Facebook users from making changes on your calendar, do not copy an administrator link or any link with the modifying permission.
Step 2: Log in to Facebook as a Facebook Developer and create your new app
Step 3: Configure your Facebook page tab
- In the Dashboard screen, at the left hand side, click on Settings section, and select Basic.
- Make sure you will add your business Policy URL (otherwise you can't turn your app public) :
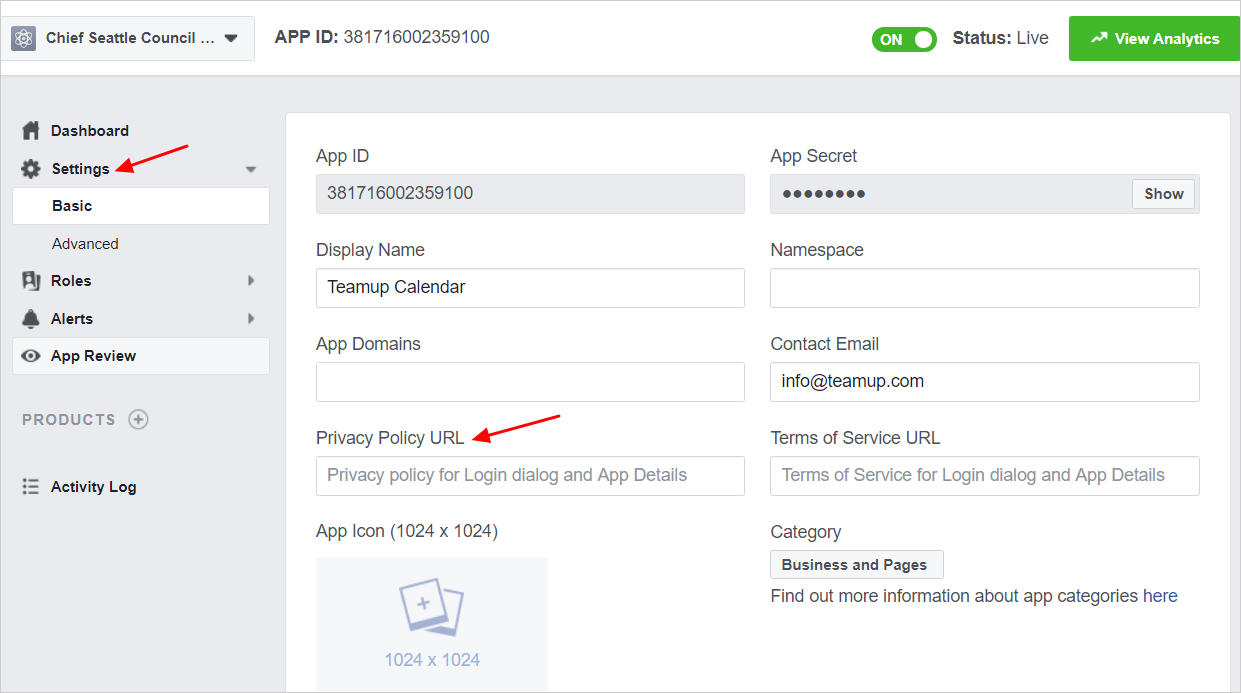
- Scroll down and enter the name of your tab (for this example I used Demo Calendar) which will be displayed on your Facebook page.
- Paste the Teamup calendar URL with Read-only permission that you have obtained in Step 1 and click Save.
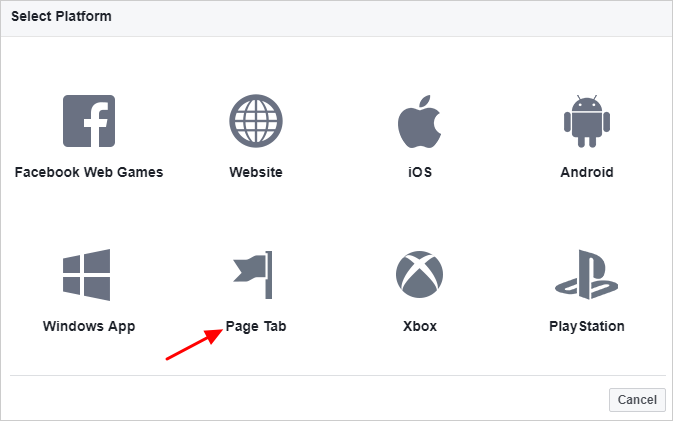
- Scroll down at the bottom and click on Add Platform that is really at the bottom.

- When prompted, select Page Tabas your platform:
- You can append a link parameter to force the calendar to be displayed in a view that is different from the default view in your calendar Settings. For example, if your default view is set to the Month view, and you want to display the same calendar in the Agenda view, you can append?view=a to the end of your read-only calendar link in this step. Learn more about usinglink parameters.
- When you're done editing the contents of this section, click the Save Changesbutton at the bottom right.
Step 4: Make your app public
- To make your application public, turn the switch ON, and click Confirm when prompted.

Step 5: Add your new custom tab to your Facebook page
- Copy this link: http://www.facebook.com/dialog/pagetab?app_id=YOUR_APP_ID&next=YOUR_URL and paste it in your browser.
- Before loading it, you will need to replace:
1) YOUR_APP_IDwith the App ID found in the Basic Settings for your app as shown on the screen in Step 3.
2) ReplaceYOUR_URL with your read-only Teamup calendar link that you had ready in Step 1 and that you entered in Step 3 as the Secure Page Tab URL.
Here is an example: http://www.facebook.com/dialog/pagetab?app_id=381716002359100&next=https://teamup.com/ks8b77f814186a2ec0
- Once you made the replacements, open the link in your browser. You will be asked to choose the page you want to add the tab:

- Choose your page and clickAdd Page Tab.
- Now you should see a new tab Teamup Calendarin the example (or whatever Tab Name you gave in Step 3) in the bottom of your tabs list on the left panel.
Step 6: Rearrange the tabs and bring it up to the top
Of course you don't want to leave your Calendar tab in the bottom of your tabs. To move it up:
- Go toSetting in the top right.
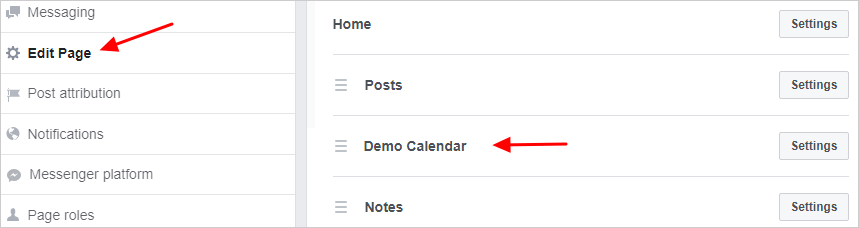
- On the Settings page, click Edit Page on the left panel.
- Look for theHome section, scroll down the tabs and locate the Demo Calendar tab, and drag it up to where you want it to be.
- Done. Now you can keep updating your calendar and promote it to your fans.
Bonus: Options to promote the events on your calendar tab
- Share your calendar tab URL in your page timeline or wherever you want to share it, for example, https://www.facebook.com/TeamupCalendar/app/381716002359100/ – It takes the format https://www.facebook.com/YOUR_PAGE_NAME/app/YOUR_APP_ID/.
- Click an event to view the event, or right-click an event on your calendar to open the context menu, then click Share.
- Now you choose any of the options to share further or save the event to your personal calendar:
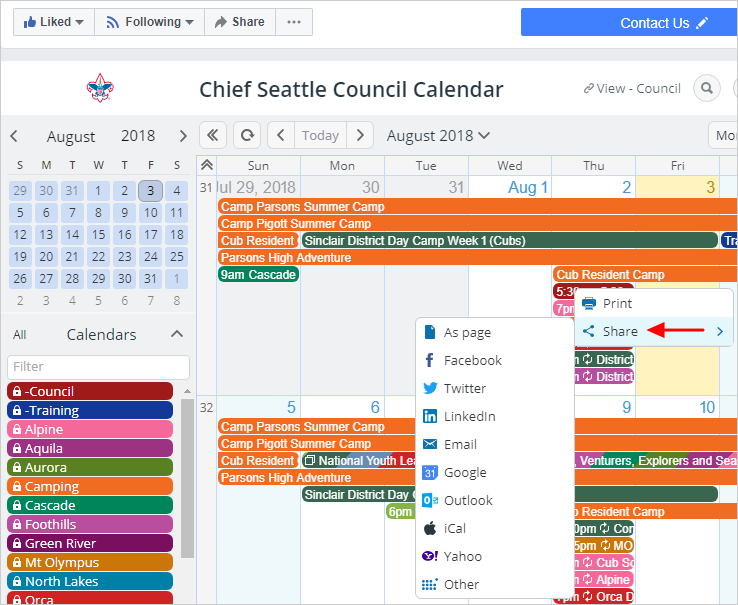
Event context menu: Options for sharing
Important to note:
– Tab apps built with this method are not supported on mobile browsers and do not render in Facebook's mobile apps. To allow your users view your Teamup Calendar on their mobile devices, add the calendar link directly to the Notes tab on a Facebook page or the Files tab on a Facebook Group as described here.
– According to Facebook developers (as of January 2020), a Facebook Page has to have a minimum of 2000 likes to be able to display a Facebook app in a page tab in the manner described above – see https://developers.facebook.com/docs/pages/tabs
Source: https://calendar.teamup.com/kb/adding-calendar-facebook-page-creating-your-own-app/
Enviar um comentário for "Easy Way to Add a Calendar to a Facebook Page I Manage"